Facebook advertising strategy for yoga studios
You’re curious about Facebook advertising strategy – but don’t want to screw things up and flush dollars down the toilet (or worse, annoy your studio clients).
Facebook ads can be
- Announcing an upcoming launch, promotion, or sale,
- Reaching and engaging with your clients more regularly, and
- Creating ads that work and can run on autopilot,
This chapter is for you.
We’ll also talk about when you should NOT be using ads to solve for studio growth.
(This post is Chapter 4 of Yoga Advertising On Facebook: The Ultimate Guide. See a full table of contents here.)
Should I even be using a Facebook advertising strategy?
If you’ve been reading the previous chapters of this guide, you’ve done the strategic dirty work that 98% of businesses don’t bother with – amazing job!
Now it’s time to build a Facebook ad that amplifies your strategy and promotion goals..
Facebook ads will amplify whatever your existing strategy is. So if you’re not sure what your strategy is, don’t start spending yet.
A good rule of thumb is that you could explain the reason for your ad – and the steps you want someone to take – in a couple of sentences to a 6th grader.
If you have a green light on that, read on.
Setup your Facebook Advertising Manager in Five Steps
One this is certain, though: The most lucrative ad strategies will always be built in the Facebook Ads Manager. So it’s valuable to get things set up now.
Think of the ads manager as your sandbox. I’m here to teach you how to get into the sandbox and use buckets, shovels, and other basic tools that will help you build stuff.
Then, you can apply strategies you learn from me or from someone else quickly and discover which strategies work best for your unique business,
Let’s do this.
Ads manager is where you want to be if you want real results from Facebook advertisements.
This quickstart guide cuts to the chase and shows you the setup process in five steps:
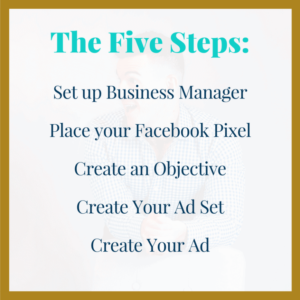
We’ll go through the first three steps in this post.
Step 1: Set up your Facebook Business Manager
Facebook and Instagram give you incredibly powerful advertising options. You can run ads to the people on your email list, your page followers, your website visitors, and even users who “look like” your buyers.
These audiences are your “low-hanging fruit” when you have a launch, promotion, or sale, so you’d want to be in front of them!
Most people don’t realize these audiences are even possible though. Usually, when we think ads, we think of the dreaded “Boost Post” button. The call to action usually looks something like this:

Gah! It’s so tempting!
You don’t just want to be in front of everyone everywhere – that wastes money. You want to be in front of the RIGHT people.
These special audiences I mentioned above are called custom audiences. To access them, you’ll need to set up the Facebook Business Manager. The Ads Manager lives in the Business Manager.
Go to business.facebook.com. You’ll know you’re in the Facebook Business Manager because its color palette is styled in grey instead of blue.
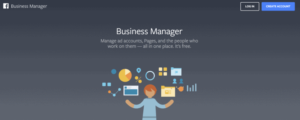
Click “Create Account” at the top-right, enter a name for your business, and select the primary Page you want your ads to run from.
Then, enter your name and a work email address. (Note: If you don’t yet have a Page for your business, create one.)
Enter the required fields, and, if needed, add people to Business Manager.
Here are some additional tips from Facebook themselves:
“If you’re a partner or work on ad accounts or Pages on behalf of another business, the business invite you to access specific Pages or ad accounts. You can also request access to their Pages and ad accounts.”
Before we go any further, let’s just set up your billing preferences.
To do this, go to the icon of three horizontal lines at the top. A drop down menu appears. Go to “all tools” for the full menu to appear. Then click “billing”.
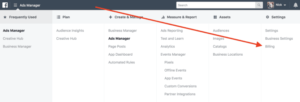
Click on payment settings, and then edit your payment setting to put a card on file.

You can also set an account spending limit if you have a monthly budget you want to enforce.
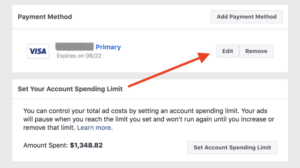
DONE. Let’s move on to step 2!
Step 2: Set up your Facebook pixel
Even if you don’t want to retarget users who visit your website today, you may want to in the future. The Facebook pixel, once placed, will remember a website visitor for up to one year after their visit – but no one can be tracked or tagged until the pixel is embedded onto your site.
First, let’s create your pixel. In your Business Manager menu, navigate to “Pixels”.

You’ll be prompted to create a pixel – click the green button to get started.
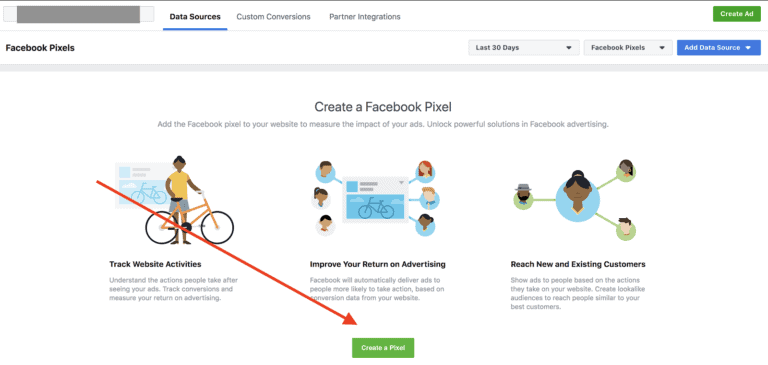
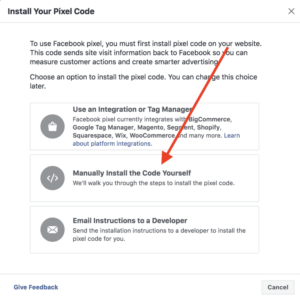
Integrations can get weird, so we’re going to manually install the code instead – choose Step 2 on this screen:
Now, in the following menu, scroll past step 1 and go to step 2. This is your Facebook pixel. When you hover over this code, a box appears prompting you to click to copy the code.
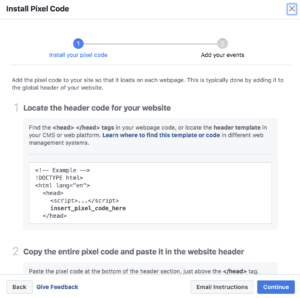
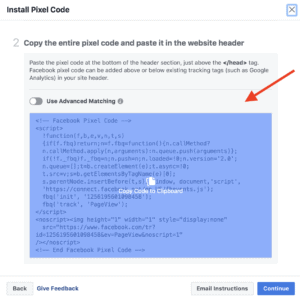
Now your code is copied! One more thing to do in this screen – Facebook suggests you download an extension called “Facebook Pixel Helper”. Download this bad boy!

This extension will help confirm that you’ve installed your pixel correctly.
Now let’s paste your copied pixel code into your website.
I’ll show you the two places I install pixels: WordPress and LeadPages. (If you have a different website provider like Squarespace, Clickfunnels, Shopify, et cetera, just google “How to install pixel for ___________.” There are loads of tutorials.)
In WordPress, the fastest way to install a Facebook pixel is to download the “Insert Headers and Footers” Plugin.
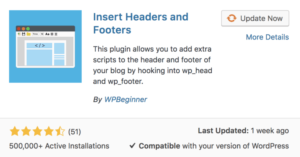
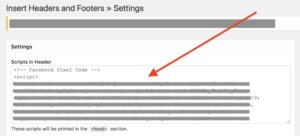
Then, in the plugin, paste your pixel code into your header.
If you’re using a landing page provider, I recommend Leadpages. It lets me create new opt-in pages and sales pages lickety-split.
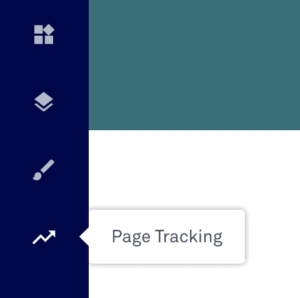
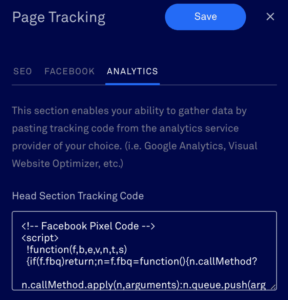
In Leadpages, navigate to the “Page Tracking” section on your left sidebar menu.
Then, choose “Analytics” and paste your pixel code into the page tracking section. Voila!
Step 3: Set up an objective
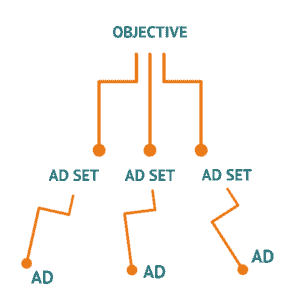
A Facebook or Instagram ad actually consists of three parts: The OBJECTIVE, The AD SET, and the AD itself.
The structure kinda looks like this diagram.
First let’s set your objective – your marketing goal that guides all of your ads.
Navigate over to the Ads Manager tab.
At the top, you’ll see a series of tabs for each of the elements of your ads, as well as an account overview tab.
Navigate to the green button that says “create”.
Now we’re going to create an objective. For now, Have your campaign name, ad set name, and ad name all be the same – you can always change this later.
Click campaign objective to show a drop-down menu.
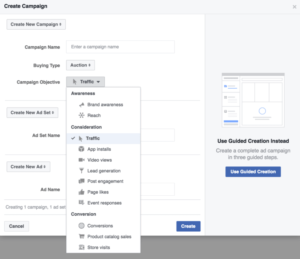
In all, there are twelve campaign objectives to choose from. I like to focus mainly on the reach, video views and conversions objectives.
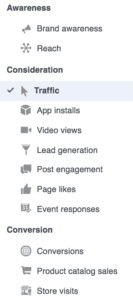
Here’s why the objective matters.
Imagine that you pick an objective and choose an arbitrary audience – let’s say 50,000 people.
Depending on your objective, Facebook will show your ad to the people in that audience who have a track record of fulfilling that objective first.
So if you want video views, Facebook will show your ad to the people in your audience that tend to watch videos the most.
If you choose traffic and are wanting people to click, Facebook will choose people who have a track record of clicking.
With a conversions objective, you’ll be able to set up a custom conversion and then see how much it’s costing you per lead.
Budget, Audience, and Placements, Oh My
Our next step in setup is the ad set. But ad sets actually start to get kind of crazy.
I mean, are your budget, schedule, location, and day-to-day interactions important to your quality of life and survival as a human?!
If you answered yes, you’re going to love ad sets.
Ad sets control the following elements of your ad: Your BUDGET, your SCHEDULE, your AUDIENCE, and your PLACEMENTS.
Let’s first dig into budget. Click here to go on to the next chapter of this guide and get all the nitty gritty about it.
And if you have any initial questions or big takeaways, leave a comment below – I’d love to hear!

