Facebook Live Software: Choosing A Setup For Your Desktop
Okay – you have a sense of HOW to go live, and you’re ready to set yourself up for livestreams on the reg from your desktop or workspace.
Now what on earth should go on your computer so that you can have the best live experience possible?
From cameras to crazy microphones, split screens and multicams, you’ve seen a lot. Oh and then there’s figuring out what Facebook live software to use.
So if you really want to
- Do the right kind of livestream for your business,
- Have livestreaming software that doesn’t break the bank, and
- Use livestreaming to grow your audience and engagement,
Read on.
Set your space up for success
When going live from your desktop, you have a tremendous number of opportunities, including sharing your screen, showcasing presentations, and dramatically increasing the video quality of your feed.
Many coaches, consultants, and personal brands build successful business entirely by livestreaming from their desktop. You can do this too – and while you can start now, I have a couple of suggestions for how to up the quality on a budget.
There are three areas to focus on when it comes to setting up your desk space.
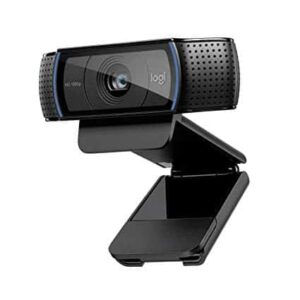
First is obviously your video. I suggest you invest in a USB webcam. The reason for this is that, if you’re livestreaming from a computer and also using the computer’s built-in webcam, you’re really straining your computer a lot and shortening its lifespan.
The Logitech c920 is a nice starter that you can usually track down for $75-100. (I’ve sometimes seen it on Amazon for as low as $50, too.) It’s a 1080p webcam that will up the quality of your stream quite a bit, and you’ll also extend the lifespan of your computer.
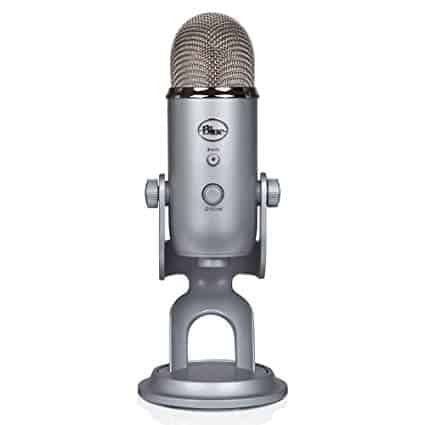
For audio, you’re welcome to use your own laptop microphone, but a small USB microphone can give you a really nice upgrade in sound quality. (You would also want a sound upgrade if you are going to do something like an interview, or potentially be a guest on a podcast.) A Blue Yeti condenser microphone is my personal recommendation.
As for lighting basics, refer to this blog post on the bare-bones best practices around lighting.
Why the Facebook live software matters
Different kinds of software will be good for different kinds of Facebook lives.
Let’s say you mostly want to do interviews with other people as a way to create content, cross-promote, and strengthen your network.
Or perhaps you’re wanting to more of a screen share. Or maybe show off multiple scenes at once, and toggle through them, like in a TV program. Some programs are better for this multi-cam approach than others.
Are you sharing your screen to demonstrate something? Or maybe you’re doing an all-out webinar? Some programs are better than others, so I’ll suggest a few of my favorites here.
Four Facebook Live Software Recommendations
Facebook Itself
Obviously, Facebook has a pretty user-friendly setup for going live. If you plan to do a straight-up, direct-to-camera live on a regular basis, this would be a good option.
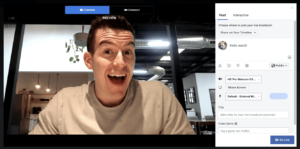
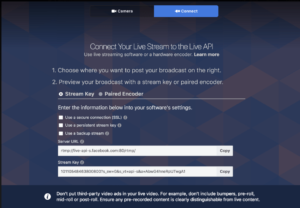
Simple webcam setups can stream through Facebook directly. If you’re using something more complex or a third-party platform, you will use a stream key, which Facebook also gives you the option to do.
BeLive
BeLive is a great platform for running interviews or even panels of interviews. You can have several different people on the platform, and can move forward with how to do this in a number of different ways.

Why do an interview? Interviews, when promoted, are great ways to cross-pollinate your audience with someone else’s. It’s also a great way to put someone up on a pedestal and really add value to them and make them feel special.
Interviews are also a nice content format that breaks up the usual delivery of information from just you, and creates space and opportunity for banter.
eCamm Live

eCamm Live is a mac-only software at this time. It’s also my personal favorite platform for going live. By setting up “scenes”, you can easily toggle back and forth between different setups, cameras, and screens.
I like eCamm a lot because the screenshare component is very user-friendly, and a lot of what I do in a livestream involves showing things on my screen or answering questions on marketing how-tos.
eCamm will also easily allow you to feed in any type of camera. For me, livestreaming tutorials I have done in the past that used a DSLR-quality video from my desktop were executed through eCamm live.
Zoom

Zoom is a video conferencing software that has become very common for businesses that operate virtually. Zoom also has great features like recording, webinar creation, and even livestreaming!
With one push of a button, you can push your Zoom conference into a Facebook live. It’s an easy and fun solution for you if you’re already acclimated to Zoom, and don’t want to learn a whole other platform.
A great strategy for pushing your Zoom into a Facebook live is to actually run a webinar in zoom, and push that webinar into a business page or private Facebook group.
Upgrades for every budget
Audio
Quality audio can make for a wonderfully intimate experience for your viewers (and you can even repurpose the audio into other content). I’ll give you three recommendations here.
As I mentioned above, a tried-and-true USB mic is the Blue Yeti. At about $100, this mic will get the job done just about anywhere, though to be fair, it is a bit bulky.
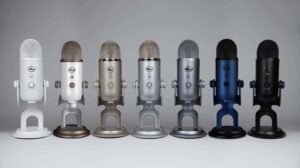
For best results, set your Blue Yeti to “cardioid” – this will ensure the mic picks up more of your voice and less of your surroundings.
If you’re wanting top-of-the-line sound quality like pro podcasters like Amy Porterfield and Rick Mulready use, look at getting the Heil PR-40.
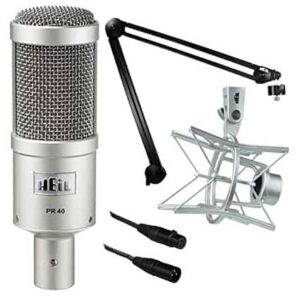
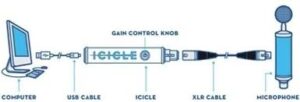
This audio solution uses an XLR cable (the kind you would see go into mixers), so to convert the XLR audio to USB, you’ll want to grab a converter like the Icicle Audio Connector.

Here’s a nice little graphic from Blue that shows how this connector can link your computer to more fancy audio setups:
Video
Again, if you want to ensure your livestreams are smooth, get a camera that is separate from your computer’s webcam.
Otherwise you risk overloading your device and/or having a choppy stream that doesn’t engage people.
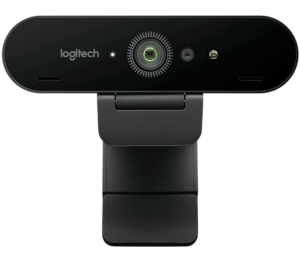
I suggested the Logitech c920 above. If you want something similar to this, but a little higher in quality, you could explore the Logitech Brio (their nicest clip-on USB option).
If you choose to go more heavy-duty and really want an HD stream, consider using a DSLR camera. I prefer using a DSLR to a camcorder, personally, because then the camera can double down as a personal camera for branding purposes (Most of the site photography and social photography I do is done by me to save some bucks).
An entry-level camera will do. I personally use the Sony a6300.
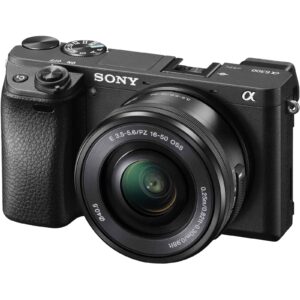
(The reason for recommending the Sony a6300 is that it has an audio output. So if you wanted to use a separate lapel microphone, for example, you could NOT do that option on a sony a6000.)
For any DSLR, though, you’ll need an HDMI-to-USB converter.
While there are other converters on the market, the plug-and-play option of choice is the AJA U-Tap connector.
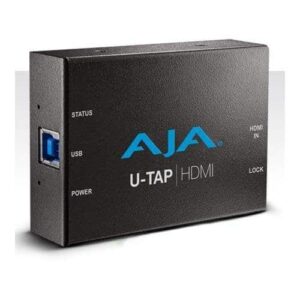
I have the version that has HDMI input. If you’re using a more fancy camera that’s using an SDI input, they have that option too.
(SDI inputs are more common on high-end cameras, such as TV-grade cameras, because the plug screws on, so if someone trips over a cord it doesn’t unplug your stream.)
Why I returned the most popular DSLR camera
I’m just gonna say it: The Panasonic GH5 is one of the most popular DSLRs on the market for livestreamers and YouTube creators.
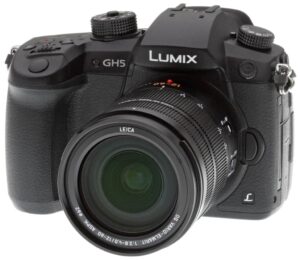
This camera is definitely an investment. But if you’re ready to go there in terms of quality (or you’re just a huge nerd like me), check it out.
I actually bought and then RETURNED this camera. The reason why? I found that I just wasn’t going to use it enough, and didn’t need THAT big of a bump in quality in order to make things happen.
If you’re just dipping your toe into livestreaming with a DSLR, you can get fully set up with the Sony option listed above for well under $1,000, whereas the Panasonic setup was sending me well over the $2,000 range.
*

